


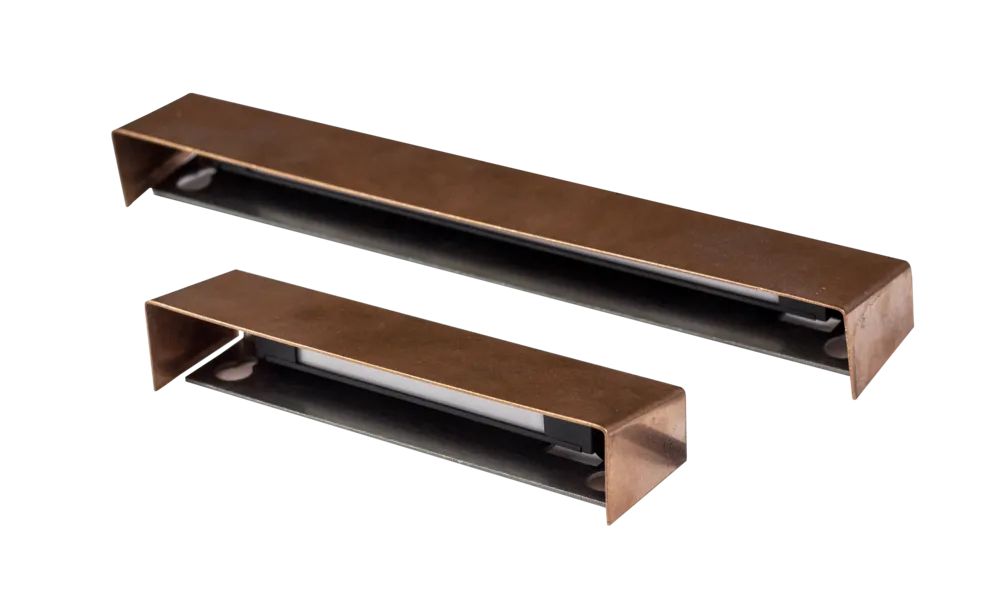
Product Details
+SURFACE MOUNT WALL WASH
The Brilliance Metal Works Surface Mount Wall Wash comes in 2 sizes small and medium for any wall or hardscape lighting need. It comes complete with Lighting Shrink professional crimp and heat shrink cable connector.
USE
Jobs with elevation changes or dark sky requirements, step, deck, or hardscape applications
LAMP: Small 1.5W, 110 Lumens, 2700K // Medium 2.5W, 200 Lumens, 2700K
FINISH: Copper, Brass, and Blackened Brass
Fixture Finish Maintenance
The Surface Mount Wall Wash fixture is available in the following finishes: copper, brass, or blackened brass. These metals offer a beautiful living finish that weathers over time to a unique patina. If you prefer to maintain the original finish, we recommend wiping down the fixture periodically with a light oil, such as WD-40.
INSTALLING THE FIXTURE
1. Separate the two-piece fixture by removing the two machine screws from the top of the body.
2. Install the wall anchors, if mounting in masonry, concrete, or sheetrock.
3. Use the provided cable connectors to connect the lead wires to the transformer main line.
4. Slide the cables into the conduit and mount the back plate onto the wall with the provided screws.
5. Screw the glare hood onto the fixture.


")
![Teis Table Runner [Aubergine]](https://www.xmastrim.shop/image/teis-table-runner-aubergine_6noUXJ_300x.webp "Teis Table Runner [Aubergine]")
